Apple Pay vs Google Wallet : Lost and Stolen Scenario

Note: You can read all articles in this series by visiting the Table of Contents

Both ApplePay and Google Wallet give very good attention to security. In fact we can even make a blanket statement that almost all mobile wallet services are at least slightly more secure than the traditional Magnetic Stripe cards, but to be honest, that is not a correct comparison. Today, we are trying to disrupt the payment industry through innovation and modern technology. In the process we should strive to achieve unprecedented levels of revolutionary security, not just an evolutionary next step.

ApplePay and Google Wallet are both focussed on achieving that. Both of them deal with security at all levels within the payment lifecycle without compromising convenience to the consumers. Today, let’s talk about some similarities and differences in their security strategy when it comes to Lost and Stolen devices.

Traditionally, when we lose our physical wallet, our immediate next step is to identify all the credit cards, debit cards and stored-value cards we had in that wallet, call the respective bank’s customer service phone numbers one by one and report it as lost or stolen. It is a tedious and very involved job that no one ever likes. Between the time we realize that our wallet was stolen and the time we report it to the Issuers, we can only hope that it has not been misused for fraud. Even after the card has been reported stolen, there is still a chance of misuse based on offline transactions that is common is some places. Liability clauses aside, it is the duty of the consumer to report any suspicious activity in their account and that is another painful task. Even if we assume that the consumer is fully protected, the fraud in general has taken place and someone in the payment ecosystem is bound to lose, not the fraudster.

Now, let’s consider the scenario where you have lost your Google Wallet equipped Android phone or an ApplePay equipped iPhone with multiple payment accounts stored inside it.

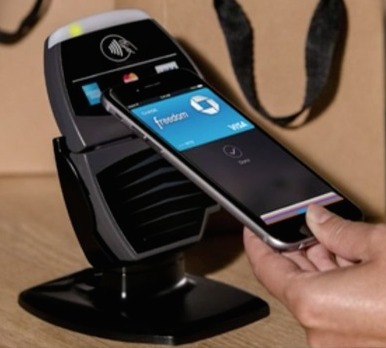
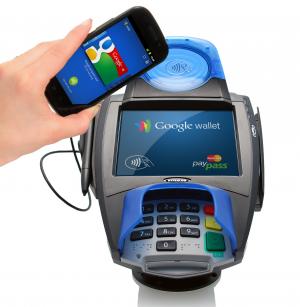
Unlike our physical wallet, which does not come with a lock and key, Google Wallet is protected by a PIN that only you know. In ApplePay, the wallet is protected using Touch ID (biometric fingerprint authentication), which only you have. A low-tech thief will not be able to breach even this first level of security. They will not be able to use any of the cards stored inside our wallet even though they have the wallet in their hands. I guess, they will just have to be happy with their new and shiny smartphone.

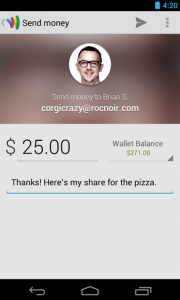
Once you realize that you have lost your phone, you don’t have to panic trying to remember all the cards you had inside it and trying to find their customer service numbers and so on. Of course, you have all the rights to be unhappy that you lost your expensive phone, but that is a different discussion. You can easily go to Google Wallet website and mark your wallet as lost or stolen with just a couple of clicks. Similarly, you can go to Apple’s iCloud website and put your phone in Lost mode. In both cases, if and when your phone comes online, it will immediately be placed in Lost mode.

For a moment let’s assume that the fraudster is not as low-tech as we thought and somehow circumvents the first level of security (PIN or Touch ID). Now that we have put the phone in lost mode, we have enabled the second level of security. In case of Google Wallet, the phone will refuse to make any payment transaction even if they hacked the PIN. In case of ApplePay, the tokens stored inside the embedded Secure Element will be erased thereby making it impossible to perform a payment transaction even if they have hacked the Touch ID. This second level of security makes the wallets doubly secure.

Once you have completed the above simple and straight-forward step, you are pretty much safe. You don’t even have to call your card issuer banks at all. In fact, you can continue to use your payment cards as usual without waiting for a new card to be posted via snail mail. This is pretty cool. But, just in case you want to be triply sure, you can always call your card Issuers in your leisure time and report them lost or stolen. If you do that, your physical cards will be blocked and you may have to wait for your new cards to be issued before making any new payment transaction. It is not necessary to perform this step, but it is always there if you need it.

Earlier, while discussing the lost mode for these mobile wallets, we blissfully ignored one important scenario. The lost mode can be communicated to your mobile wallet only if your phone is online. If your phone does not come online, neither Apple nor Google will be able to propagate the lost mode to their respective wallets. What if our high-tech thief makes sure that your phone does not go online after stealing it? Technically, this compromises the second level of security. If (a big If) they were also able to hack the first level of security (PIN or Touch ID), then it may seem that they are all set to steal our money. Let’s analyze this scenario in the context of ApplePay and Google Wallet.

In the case of ApplePay, the assumption is that, biometric fingerprint authentication is strong enough and cannot be broken. That is the reason why ApplePay does not allow for PIN based authentication of payment transactions because they consider it as technically less secure. In the rarest of scenarios where the fraudster is able to successfully crack the fingerprint auth and also successfully makes sure that the phone cannot be put into lost mode, then there is an open loop hole that can be exploited (unless I am missing something). In this scenario, we always have our last resort (third level of security) of locking our physical cards though.

In the case of Google Wallet, we cannot assume the PIN to be as strong as biometric fingerprint authentication. Moreover, it is also possible to configure Google Wallet such that it does not prompt for PIN for a certain time-period. This leaves a hole in security if your device is lost during that time-period. But, Google has one more trick up its sleeve. Unlike ApplePay, where a payment transaction never enters Apple’s servers, Google wallet’s cloud server does come into picture when a payment transaction is conducted. Google has to authorize a transaction in transit. So, technically, even if the fraudster does not allow the phone to go to lost mode and successfully cracks the PIN as well, at the end of the day, the transaction has to pass through Google wallet’s cloud servers. Since we have already placed the wallet in lost mode in the server (although it is not yet propagated to the physical phone), the transaction will be rejected by Google at the server side. The fraudster can do nothing but be shocked after all the hard work he has done trying to steal our money.

In conclusion, for lost/stolen device scenario both ApplePay and Google Wallet offer multiple layers of security. Some may consider ApplePay’s biometric auth to be more secure, while others will think that Google Wallet’s server side auth is a better strategy. Technically both are sound and revolutionary. We will just have to wait and see which one stands the test of time in the real-world.

Related Reading:

Mobile Payments: What is Apple Pay?

What is Apple Pay?

ApplePay is a mobile payment service developed by Apple and is scheduled to be operative starting October 20, 2014. It offers two different services and we will discuss them briefly here.

Service 1 – Pay in-store:

With this service you can use your NFC enabled iPhone 6 or iPhone 6 Plus or Apple Watch to purchase in-store by just tapping your phone against a contactless terminal and placing your fingers on the Touch ID. The contactless terminals are not Apple specific; they already exist in the wild and support contactless cards from Visa (PayWave) and MasterCard (PayPass). Apple just uses the same standard protocols used by the Contactless cards so as to be compatible with existing infrastructure.

apple-pay-pos

To support such in-store payments, ApplePay stores the necessary payment data inside a Secure Element embedded in the phone’s hardware itself. When you tap to pay, ApplePay uses Secure Element based card-emulation to transmit payment data to the contactless terminal. For a more detailed analysis of how ApplePay works behind the scenes, visit my blog post on Apple Pay – An Attempt to Demystify.

Beyond the basics, there are a few more interesting things that are unique to ApplePay. They are

  • Real payment card data is never stored inside the phone’s Secure Element. A token – based on EMVCo’s tokenization specification – is stored instead. This way, merchants will never have access to real card details and that relieves the consumer from the fear of merchants being hacked (like the recent Target and Home Depot data breaches). Moreover, when you lose the phone, you don’t have to replace the real card. We can just provision new tokens to a new phone and be done with it.
  • Every payment transaction is authenticated using Apple Touch ID (biometric fingerprint authentication). This is a very strong form of authentication, even better than the one offered by EMV based Chip n PIN cards.
  • Even if you don’t have an iPhone 6 or iPhone 6 Plus (which are the only Apple phones with NFC and Secure Element), you can still use ApplePay to pay at stores using a combination of Apple Watch and iPhone 5 or 5s.
  • Apple does not take part in the payment authorization process and does not store any transaction related information in their servers. They don’t store your payment card details either. They are very particular about this because they want the merchants to know that Apple is not a threat to them like other wallet providers are and they want the consumers to know that their data is safe with themselves.

 Service 2 – Pay in Mobile Apps:

Using this service, you can pay for items from within mobile apps that support ApplePay. If you have ever used the iOS or OS-X keychain to store and auto-fill passwords, this will look very familiar. Participating mobile apps will show a button labelled Apple Pay. Checking out is as easy as tapping that button and placing your finger on the Touch ID.

apple-pay-app

Mobile Payments Blog Series

Welcome to the Mobile payments FAQ and not so FAQ series and you are on FAQ #17. The idea behind this series is to share and learn as much as possible about the field of mobile payments. If you like, you can read all of the FAQs by visiting the Table of contents page.

Related Reading

Mobile Payments: What is Google Wallet?

What is Google Wallet?

Google Wallet is a mobile/digital wallet developed by Google. Their grand vision probably is to replace the complete physical wallet with its virtual counterpart. They are not there yet, but in the process of marching towards their grand vision, they have created a few important services. We will discuss them one by one in a moment.

Google Wallet has been around since 2011 and has seen at least 3 major revisions. Each version had a very different technical approach to mobile payments mostly because of the politically difficult landscape that surrounds it. We will discuss each version, challenges faced and how they achieve mobile payments in separate posts later. In this post, we will assume the third (and latest) version of Google Wallet. This version was released along with Android Kit-Kat and it uses Host-based Card Emulation instead of Secure Element based Card Emulation.

As a consumer you can add your debit cards, credit cards, stored value cards, loyalty cards, gift cards etc. to your Google Wallet account either on their website or using the Google Wallet app on your smartphone. You may even add some money directly to your wallet account balance.

Pay at Physical POS:

Using this service, you can use your NFC enabled Android phone to purchase in-store by just tapping your phone against a contactless terminal. The contactless terminals are not Google specific; they already exist in the wild and support contactless cards from Visa (PayWave) and MasterCard (PayPass). Google just uses the same standard protocols used by the Contactless cards so as to be compatible with existing infrastructure.

google-wallet-tap

Google has also developed a proprietary protocol on top of existing Contactless protocols to support making payments, redeeming coupons/offers and receiving loyalty all with just one tap. But for this to work, the merchants will have to upgrade their terminal to explicitly support Google’s own protocol.

But there is a big challenge with contactless terminals. Today, they are not very common with retailers in the United States. Most of the retailers still have only traditional Magnetic Stripe terminals. Eventually, the expectation is that all merchants will have a contactless terminal, but in the meantime, we need a solution. To fill this gap, Google Wallet also offers a Debit card from MasterCard that has a Magnetic Stripe interface. So, if a merchant does not have a contactless terminal, you can still use the Google Wallet Debit card to make a payment.

google-wallet-debit-card

Pay Online:

Using this service, you can pay on eCommerce websites and mobile apps where you see the Buy with Google sign. Here, Google Wallet acts more like a digital wallet than like a mobile wallet. Google offers different APIs for sale of digital goods and sale of physical goods. The difference is that, for sale of digital goods, a seller need not have a separate relationship with a payment processor. Google will take care of the payment processing as a whole. On the other hand, for sale of physical goods, a seller would need to have a payment processor and a merchant account with an Acquirer.

google-wallet-buy-with-google-2

Pay Friends:

Using this service, you can use Google wallet to send money to anyone in the US with an email address. This service is generally used to pay friends, split bills and sometimes referred to as Person to Person payments or P2P for short. Recently, Google also added the ability to send money as an email attachment when using Gmail as the email provider.

google-wallet-pay-friends

Mobile Payments Blog Series

Welcome to the Mobile payments FAQ and not so FAQ series and you are on FAQ #16. The idea behind this series is to share and learn as much as possible about the field of mobile payments. If you like, you can read all of the FAQs by visiting the Table of contents page.

Related Reading

jCarouselLite version 1.1 released !

It has been quite a while since I worked on updating the jCarouselLite project. Meanwhile, the community has shown its love by actively contributing features and defect fixes. It is always a pleasant experience to see such active participation by the community, but there is also a challenge.

Many of the mods were spread around different websites, GitHub forks, Stack Overflow answers and comments. Consequently, it was not easy for a new user to start using it. So, I thought I should give some order to this by collecting them all back into the original project and that is exactly what I have done here… and much more…

Heads up! The plugin still weighs only 2 KB.

Given below is a list of items that has changed, leading to the release of version 1.1. Visit the project page and change log for more details.

  • Added a Github project. Feel free to raise any new defects or feature requests here
  • Updated to support jquery 1.11.x version
  • Fixed a few defects
    • We were skipping items in a particular rare combination of circular:true mode and scroll/visible/start options. Fixed
    • We were jumping to the top of the page when the navigation buttons are disabled in circular:false mode. Fixed
    • We were unintentionally styling grand-children of the main UL and LI. Now it will style only the top level UL and LI. Fixed
    • In circular:false mode, in a particular combination of total/visible/scroll options, we were unable to navigate to the last few items. Fixed
    • In auto-scroll mode, the Interval was not getting reset when next/prev navigation button was clicked. Fixed
    • In circular:false mode, with start:0, the prev button was not getting disabled. Fixed
    • Fixed an issue with some minification libraries
  • Changes to the project site
    • Introduced a Styling page to help you understand the default styling and ways in which you can apply custom styling to your carousel
    • Revamped the Demo page to make it cleaner and more beautiful. It is easier to view-source now than it was before
    • Updated the styling in Demo page to reflect the custom styling in Styling page
  • Added default options globally. This way you can set the default options using $.fn.jCarouselLite.options once instead of passing them for every carousel you create
  • Removed the separate width() and height() functions and replaced with jQuery.outerWidth(boolean)

At present, I am working on a few new features to the plugin and a few more additions to the project site. It will make this plugin even more useful and flexible. You can expect a 1.2 release for these enhancements in the next couple of weeks. Thanks again everyone for showing extraordinary interest in this simple and light weight carousel.

Apple Pay vs Google Wallet : The Secure Element

Note: You can read all articles in this series by visiting the Table of Contents

Both Google Wallet and ApplePay are trying to solve the same set of problems – mobile payments at the physical POS and inside apps. They have many characteristics that are very similar, but they also differ in significant ways when it comes to implementation and user experience. In this series of blog posts, we will analyze a few similarities and differences one by one. We will start by talking about the Secure Element today.

A Secure Element (SE) securely stores card/cardholder data and does cryptographic processing. During a payment transaction it emulates a contactless card using industry standard protocols to help authorize a transaction. The Secure Element could either be embedded in the phone or embedded in your network operator’s SIM card. We will generically refer to them as device-based Secure Element. More recently, with the introduction of HCE technology by Google, the definition of Secure Element has been expanded to include a secure cloud as well. We will refer to them as cloud-based Secure Element.

In the beginning, Google Wallet v1.0 started its journey by using the device-based Secure Element for card emulation. This approach didn’t work out well for Google as most of the major network operators (Verizon, AT&T and T-Mobile) decided to support their own brand of wallet called Softcard (previously Isis) and blocked access to the Secure Element for any other wallet providers. Google had no choice but to move on.

se-hce-dual-ce

Today, Google wallet v3.0 does not use a device-based Secure Element. It uses a technology called Host-based card emulation (HCE) instead, where card-emulation and the Secure Element are separated into different areas. For example, in HCE mode, when an NFC enabled Android phone is tapped against a contactless terminal, the NFC controller inside the phone redirects communication from the terminal to the host operating system. Google wallet picks up the request from the host operating system and responds to the communication with a virtual card number and uses industry standard contactless protocols to complete the transaction. This is the card-emulation part. The transaction proceeds and reaches the Google cloud servers where the virtual card number is replaced with real card data and authorized with the real Issuer. Since the real card data is securely stored in Google’s cloud servers, the cloud represents the Secure Element part. In general, this approach is considered less secure compared to the embedded SE approach. But there are some areas (like Lost & Stolen use-case) where it is more secure. We will discuss that in a different post.

NOTE: This doesn’t mean that Android operating system does not support device-based Secure element anymore. In fact it supports both device-based Secure Element and HCE using a routing table at the NFC controller level.

ApplePay, in contrast, works using traditional device-based Secure Element. It does not use HCE technology. Consequently, Apple does not store the real card or token data in their cloud servers at all. The on-device Secure Element essentially performs card-emulation in addition to secure storage. It sends payment data to the contactless terminal when you Tap & Pay. I have attempted to demystify how ApplePay works in one of my previous posts. In many ways it is similar to how Google Wallet v1.0 used to work (with some important differences).

se-ce-iphone

First, ApplePay does not store the real card data inside the SE. This is in direct contrast to Google Wallet 1.0 and Softcard. Instead, they store a token that conforms to EMVCo tokenization specification. It is this token (along with a cryptogram) that gets sent to the contactless terminal. During the authorization flow, the card network identifies the token, de-tokenizes them into real PAN with the help of a Token Service Provider (TSP) and sends the real PAN over to Issuer for authorization.

Second, Apple owns and controls the Secure Element embedded inside the device thereby avoiding unnecessary challenges from the MNOs.

Finally, Apple significantly simplified the provisioning model. If they had to provision the real card details, they would have to depend on a complex and convoluted process. Fortunately, they provision a token instead and took the opportunity to simplify the process to a bare minimum.

In the next post, we will discuss how these two services differ when the device is lost or stolen.

Related Reading: